
You need a verified sending domain to send campaigns. Connecting a domain requires an active plan; without one the page shows See plans instead of Add domain.
- On Sending › Domains, click Add domain.
- Type your main domain in Domain, such as example.com. You send from is send.example.com by default; you can type another subdomain with Change.
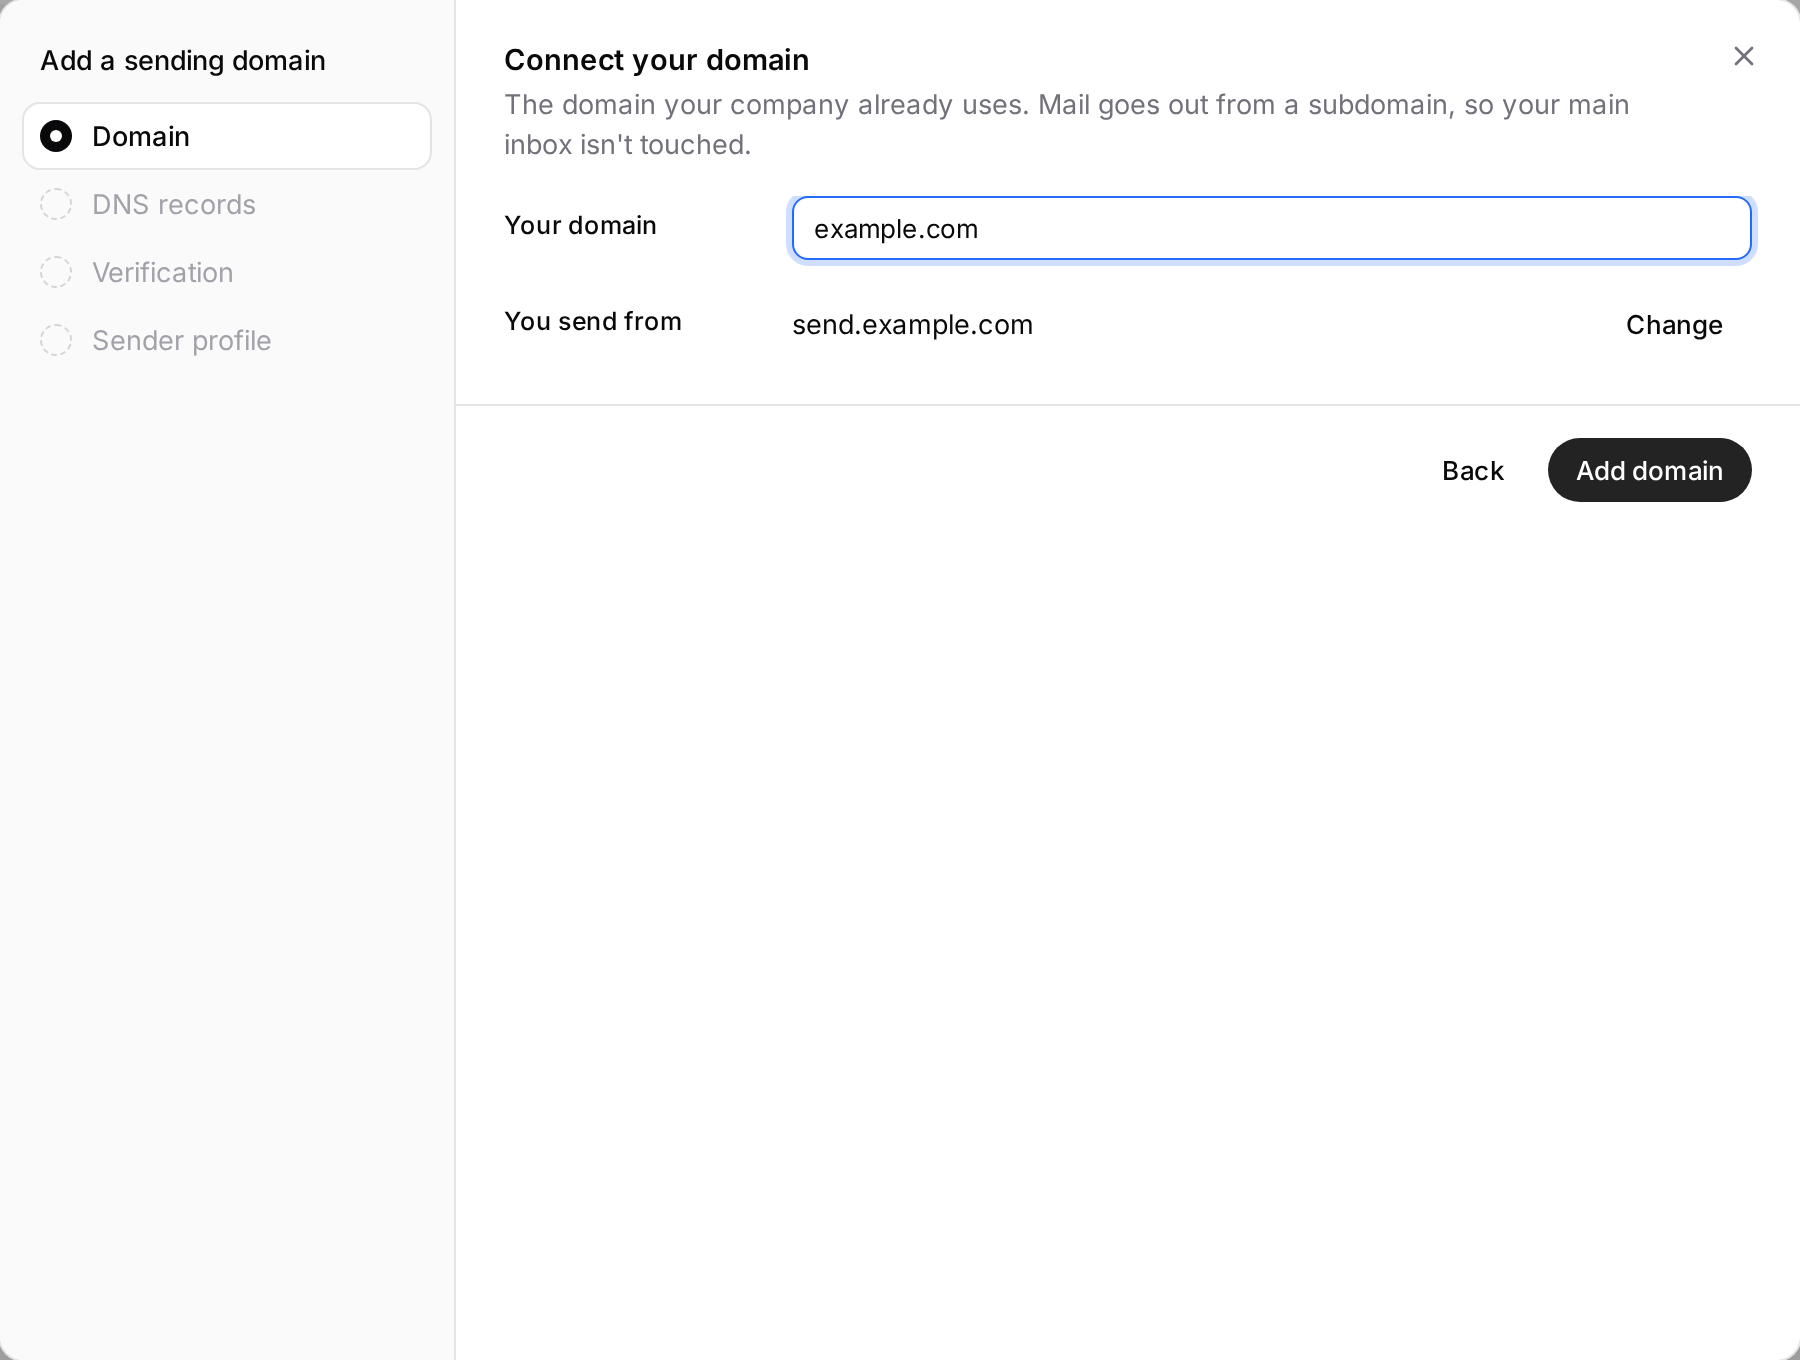
- Click Add domain. Outfound recognises your DNS provider and the Add the DNS records screen shows the right path for it.
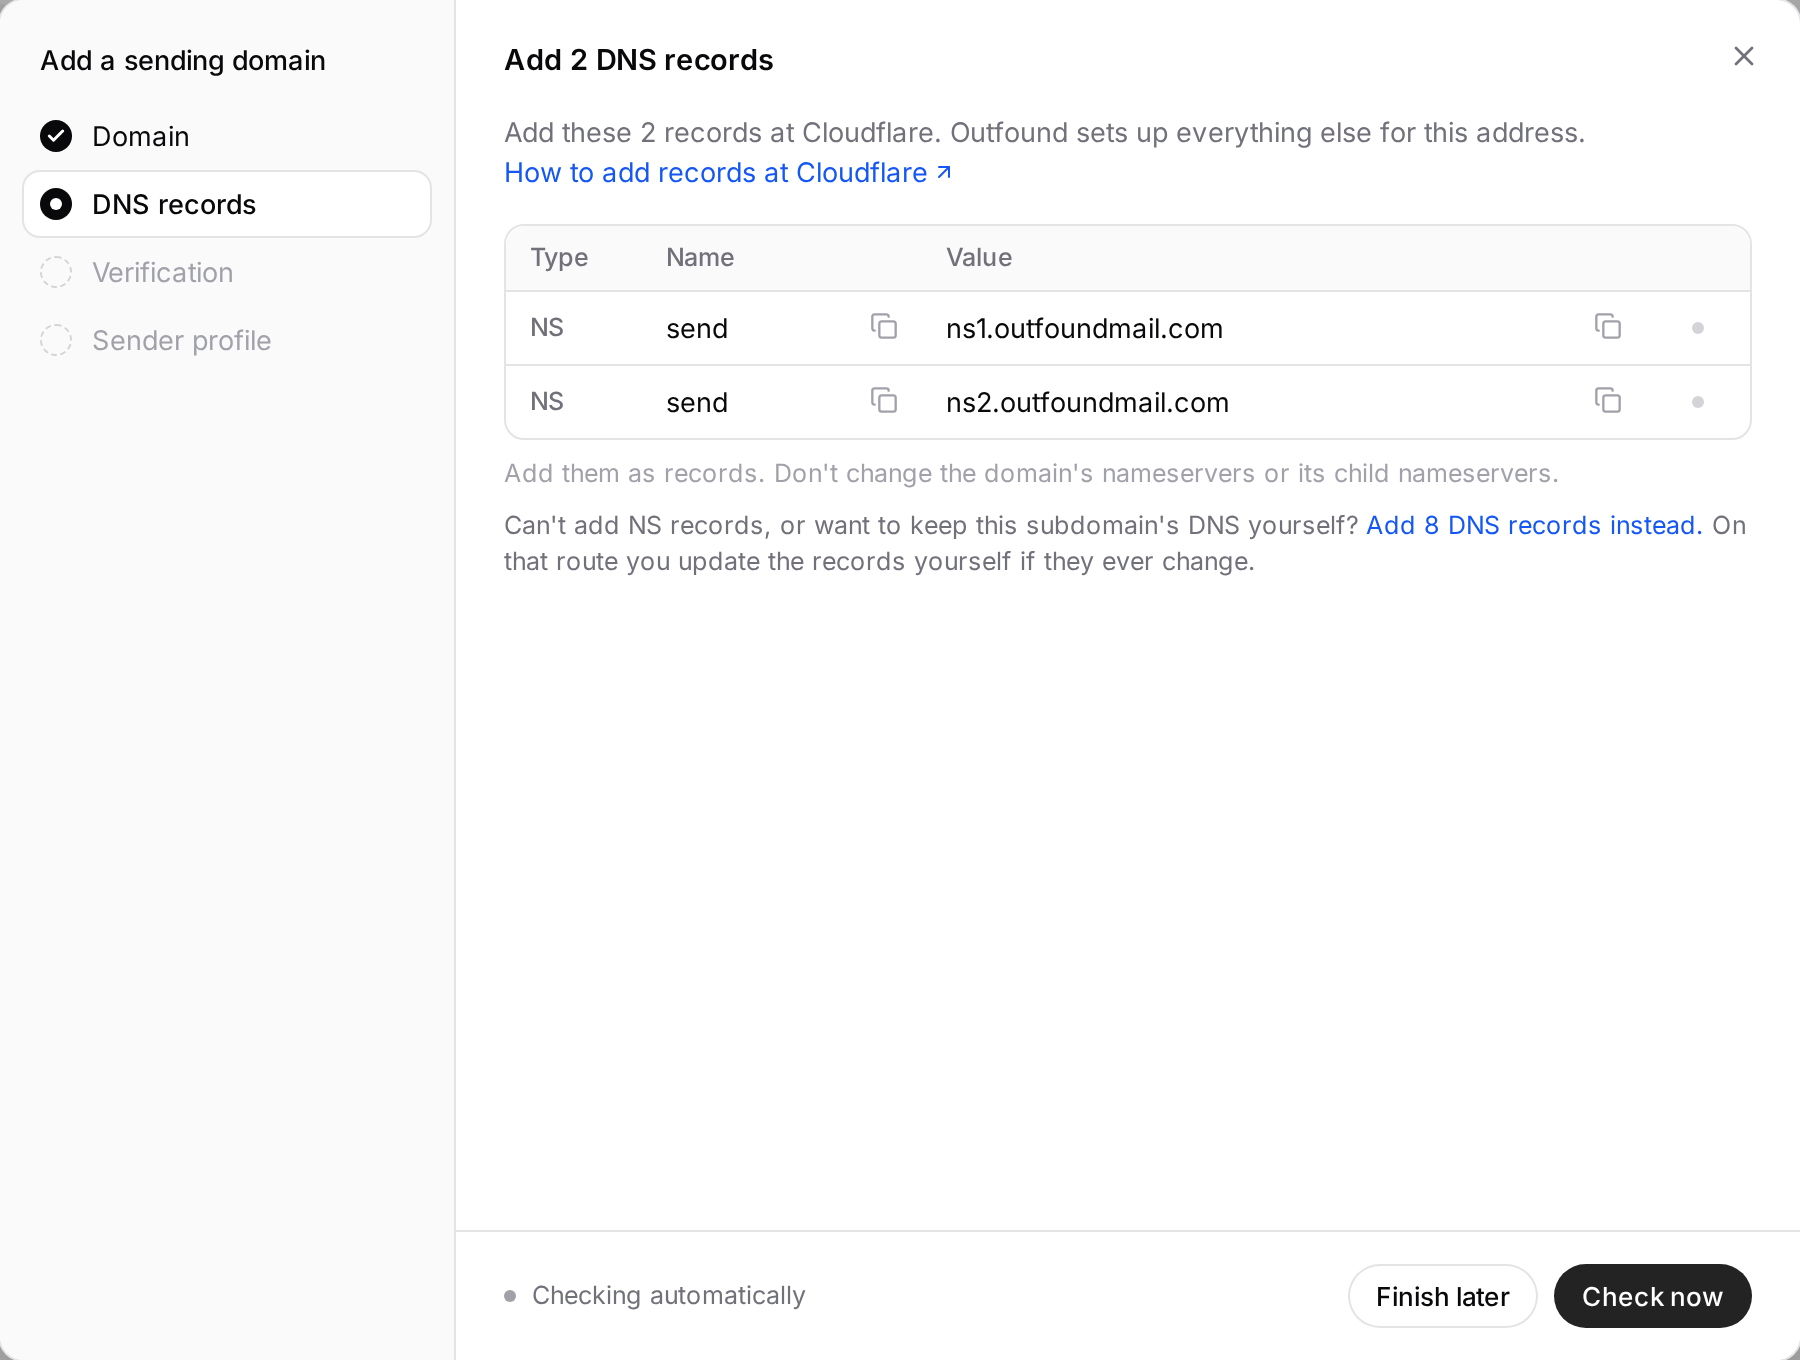
- If your provider allows it, you add just two NS records and Outfound writes the other records itself. If the sending subdomain already has a record, delete it first. If you can't add NS records, switch to the eight records with Add 8 DNS records instead. on the same screen.
- With other providers, eight records are listed. Use Copy all to copy them, or Email records to send them to your IT team. A record marked Replaces the current record must replace the existing one, not be added next to it.
- Add the records in your provider's DNS records screen. Don't change your domain's nameservers: that stops your website and email.
- Press Check now. When everything is verified, the dialog says the domain is ready; continue with Create sender profile.
You can stop half way with Finish later; the domain stays in the list with its status (for example Waiting for 2 NS records). Click the domain and choose Continue setup to pick up where you left off. If your domain is at IONOS, see the IONOS article for the exact steps.